Swagger, Postman, Web Api and Identity Server

I have been developing software with Microsoft technologies since .Net 2.0 and more recently have been developing .Net Core WebApi services with React front-ends. I became a Scrum Alliance certified scrum master in 2012 and since then have also become a certified scrum developer and certified scrum professional. As a technical lead my more recent contract roles have included the support of agile transformation or best practise adoption as well as application development.
In the previous post on using Identity Server 4 to secure MVC Client and Web Api applications the implementation required that users are authenticated and authorised to use the system. This post shows how Swagger or Postman can be configured to use the identity Server as an access token provider and then query the Web Api.
Configuring Swagger
Swagger will document the endpoints available in the Web Api but by default it will not provide a mechanism for authentication or authorisation. To configure Swagger to use Identity Server first, in the Identity Server Config class add a "WebApi-Swagger" client to the Clients collection:
        public static IEnumerable<Client> Clients =>
            new Client[]
            {
                ...
                new Client
                {
                    // client for the Swagger of the WebApi project
                    ClientId = "WebApi-Swagger",
                    ClientSecrets = { new Secret("secret".Sha256()) },

                    AllowedGrantTypes = GrantTypes.Implicit,
                    AllowAccessTokensViaBrowser = true,
                    RedirectUris = { "https://localhost:44373/swagger/oauth2-redirect.html" },
                    PostLogoutRedirectUris = { "https://localhost:44373/callback.html" },

                    AllowedScopes = { "openid", "profile", "WebApi" }
                }
            };
Then in the Web Api Startup class a security definition needs to be added to the .AddSwaggerGen(...) services configuration. This defines the authentication type and points to the Identity Server. An operation filter is needed to add the authorisation requirements to the Web Api endpoints included in the Swagger UI:
            services.AddSwaggerGen(c =>
            {
                c.SwaggerDoc("v1", new OpenApiInfo { Title = "WebApi", Version = "v1" });
                // add a security definition to get an access token
                c.AddSecurityDefinition(SecuritySchemeType.OAuth2.ToString(), new OpenApiSecurityScheme
                {
                    Type = SecuritySchemeType.OAuth2,
                    Flows = new OpenApiOAuthFlows
                    {
                        Implicit = new OpenApiOAuthFlow
                        {
                            AuthorizationUrl = new Uri("https://localhost:5001/connect/authorize"),
                            TokenUrl = new Uri("https://localhost:5001/connect/token"),
                            Scopes = new Dictionary<string, string>
                            {
                                { "WebApi", "WebApi" }
                            }
                        }
                    }
                });
                // add reference to the acccess token to the endpoints in swagger
                c.OperationFilter<AccessTokenOperationFilter>();
            });
As this Web Api requires authorisation by default the AccessTokenOperationFilter ignores any endpoints that have the AllowAnonymousAttribute and adds the security requirement to all other endpoints:
using Microsoft.AspNetCore.Authorization;
using Microsoft.OpenApi.Models;
using Swashbuckle.AspNetCore.SwaggerGen;
using System.Collections.Generic;
using System.Linq;

namespace WebApi
{
    public class AccessTokenOperationFilter : IOperationFilter
    {
        public void Apply(OpenApiOperation operation, OperationFilterContext context)
        {
            // ignore endpoints that have the AllowAnonymousAttribute
            var hasAnonylousAttribute = context.MethodInfo.DeclaringType.GetCustomAttributes(true).OfType<AllowAnonymousAttribute>().Any()
                || context.MethodInfo.GetCustomAttributes(true).OfType<AllowAnonymousAttribute>().Any();

            if (!hasAnonylousAttribute)
            {
                operation.Responses.Add("401", new OpenApiResponse { Description = "Unauthorized" });
                operation.Responses.Add("403", new OpenApiResponse { Description = "Forbidden" });

                operation.Security = new List<OpenApiSecurityRequirement>
                {
                    new OpenApiSecurityRequirement
                    {
                        [
                            new OpenApiSecurityScheme
                            {
                                Reference = new OpenApiReference
                                {
                                    Type = ReferenceType.SecurityScheme,
                                    Id = SecuritySchemeType.OAuth2.ToString()
                                }
                            }
                        ] = new[] { "WebApi" }
                    }
                };
            }

        }
    }
}
Back in the Startup class the OAuth details are added to the .UseSwaggerUI(...) configuration. This maps to the client set up in Identity Server configuration:
                app.UseSwaggerUI(c =>
                {
                    c.SwaggerEndpoint("/swagger/v1/swagger.json", "WebApi v1");
                    // set up the configuration for the Swagger UI to get the access token
                    c.OAuthClientId("WebApi-Swagger");
                    c.OAuthAppName("WebApi-Swagger");
                    c.OAuth2RedirectUrl("https://localhost:44373/swagger/oauth2-redirect.html");
                    c.OAuthUseBasicAuthenticationWithAccessCodeGrant();
                });
Now running the Identity Server and Web Api projects, the Swagger page for the Web Api includes an Authorize button and the endpoint sections that require authorisation will display an open padlock. Executing these endpoints will result in a 401 unauthorized response:
 Clicking the Authorize button opens an Available Authorizations dialog:
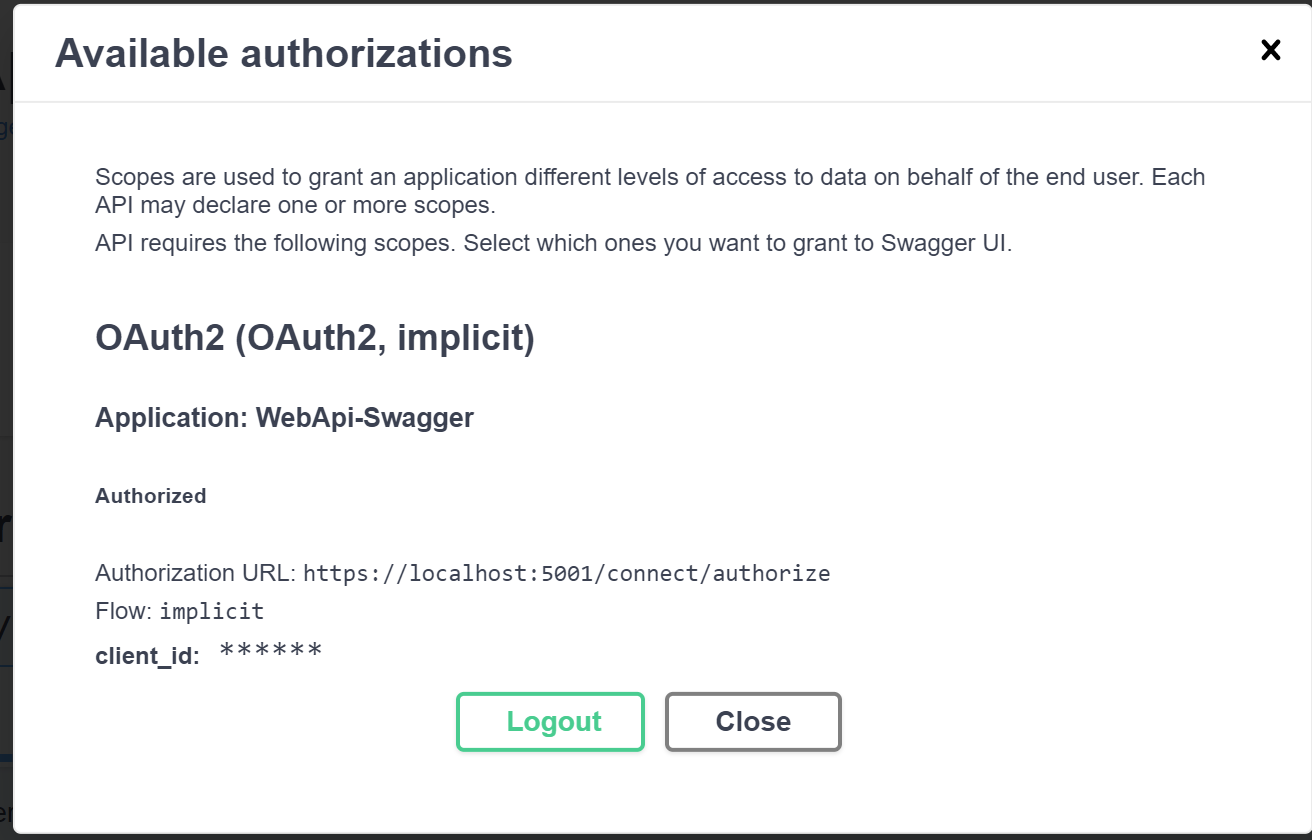
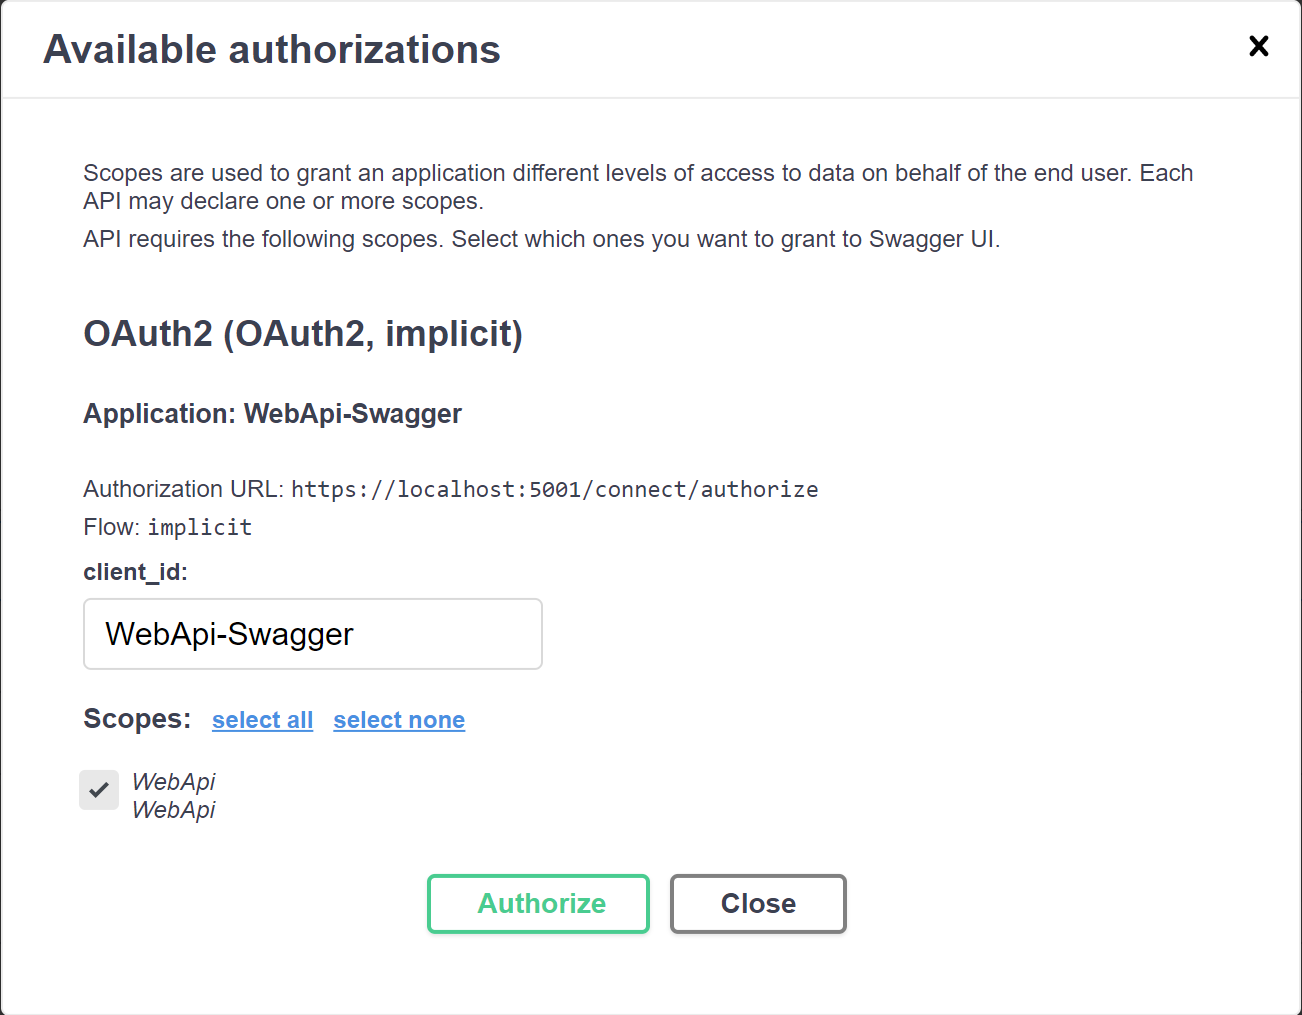 Selecting the scope and clicking the Authorize button will request an access token from the Identity Server, if successful the Available Authorizations dialog will display a Logout button:
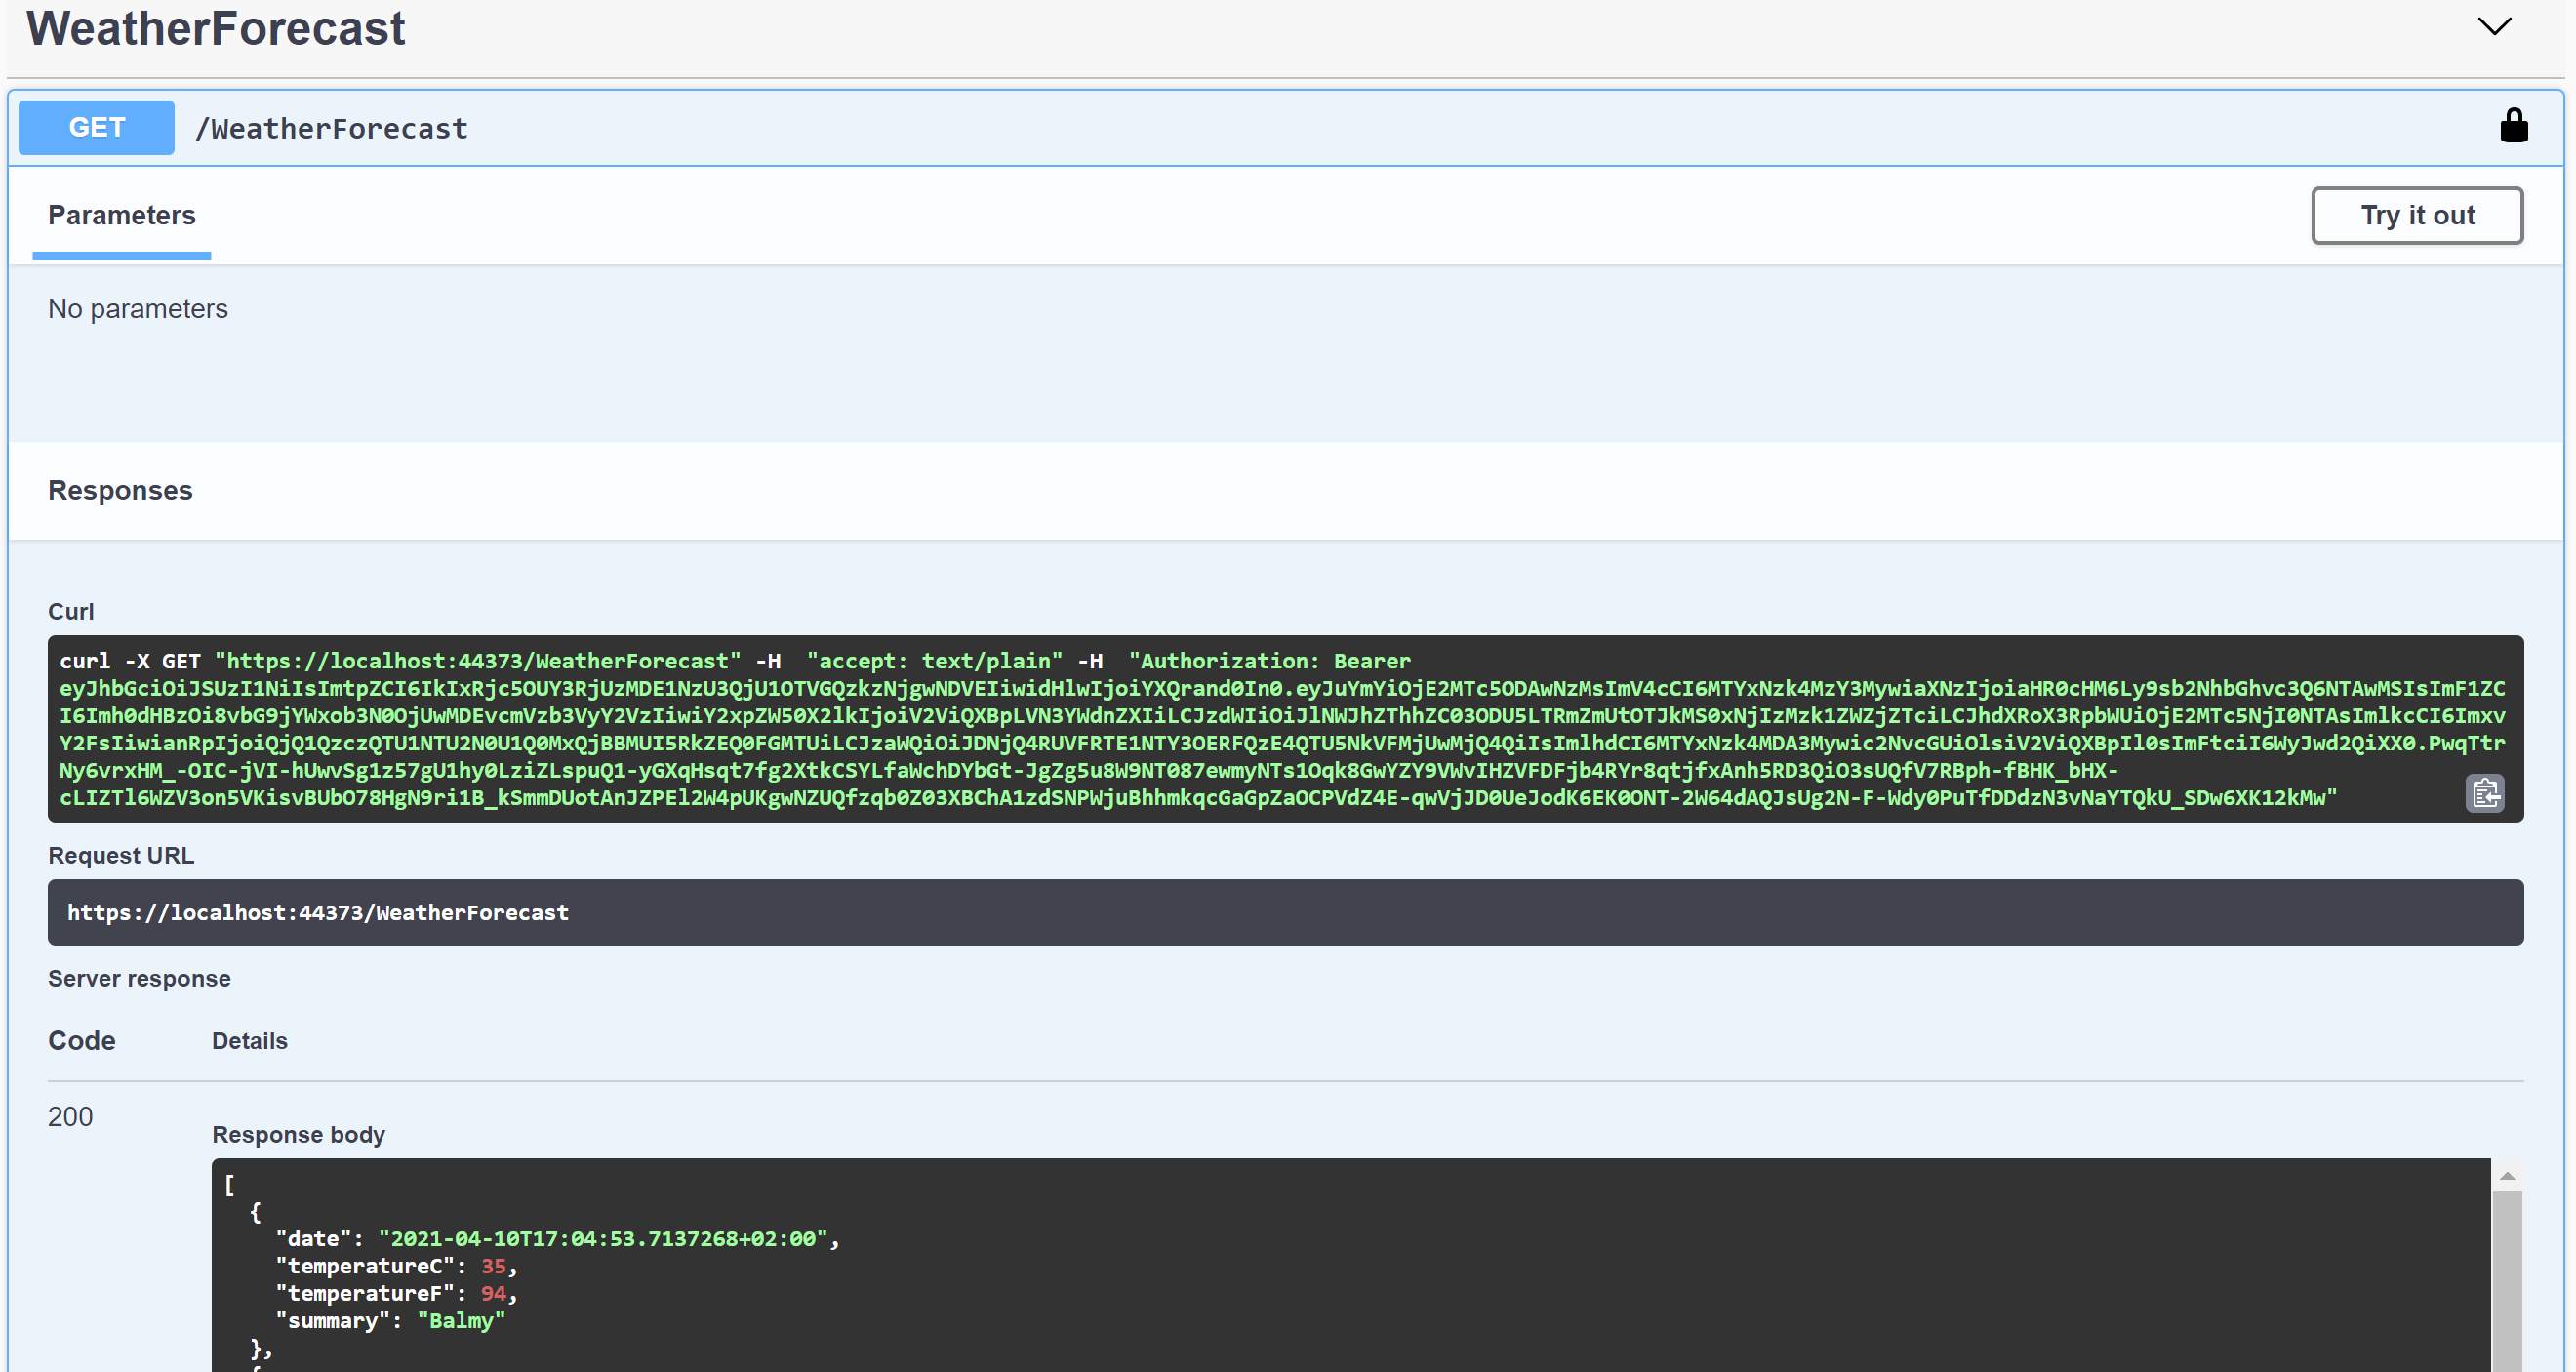
 The endpoint sections padlock will now be closed and the endpoints will return a successful response. In the Curl output you will see that a Bearer token has been added to the request:
Configuring Postman
Postman is a really useful tool for interrogating Web Api's. Like Swagger, a 401 unauthorized response will be encountered when querying endpoints that require authorisation, so to configure Postman to get access tokens from Identity Server, again a client needs to be added to the Identity Server Clients collection:
        public static IEnumerable<Client> Clients =>
            new Client[]
            {
                ...
                new Client
                {
                    ClientId = "Postman",
                    ClientSecrets = { new Secret("secret".Sha256()) },

                    AllowedGrantTypes = GrantTypes.Code,
                    RequirePkce = false,
                    RedirectUris = { "https://www.getpostman.com/oauth2/callback" },
                    PostLogoutRedirectUris = { "https://www.getpostman.com" },

                    AllowedScopes = { "openid", "profile", "WebApi" }
                }
            };
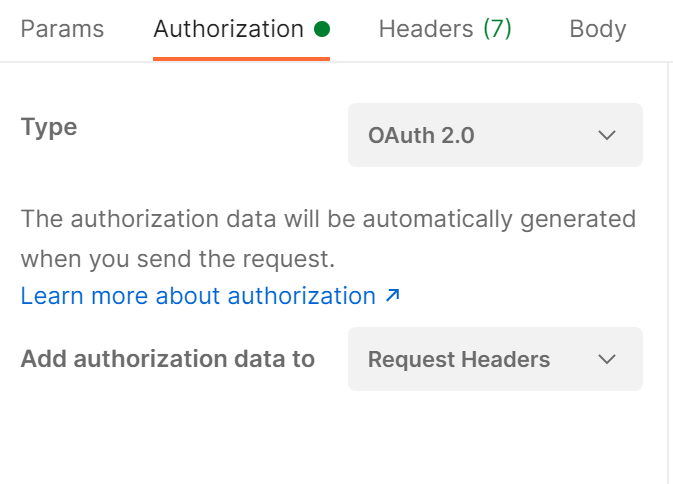
Then it is a question of settings up the configuration in the Authorization tab of the API window in Postman:
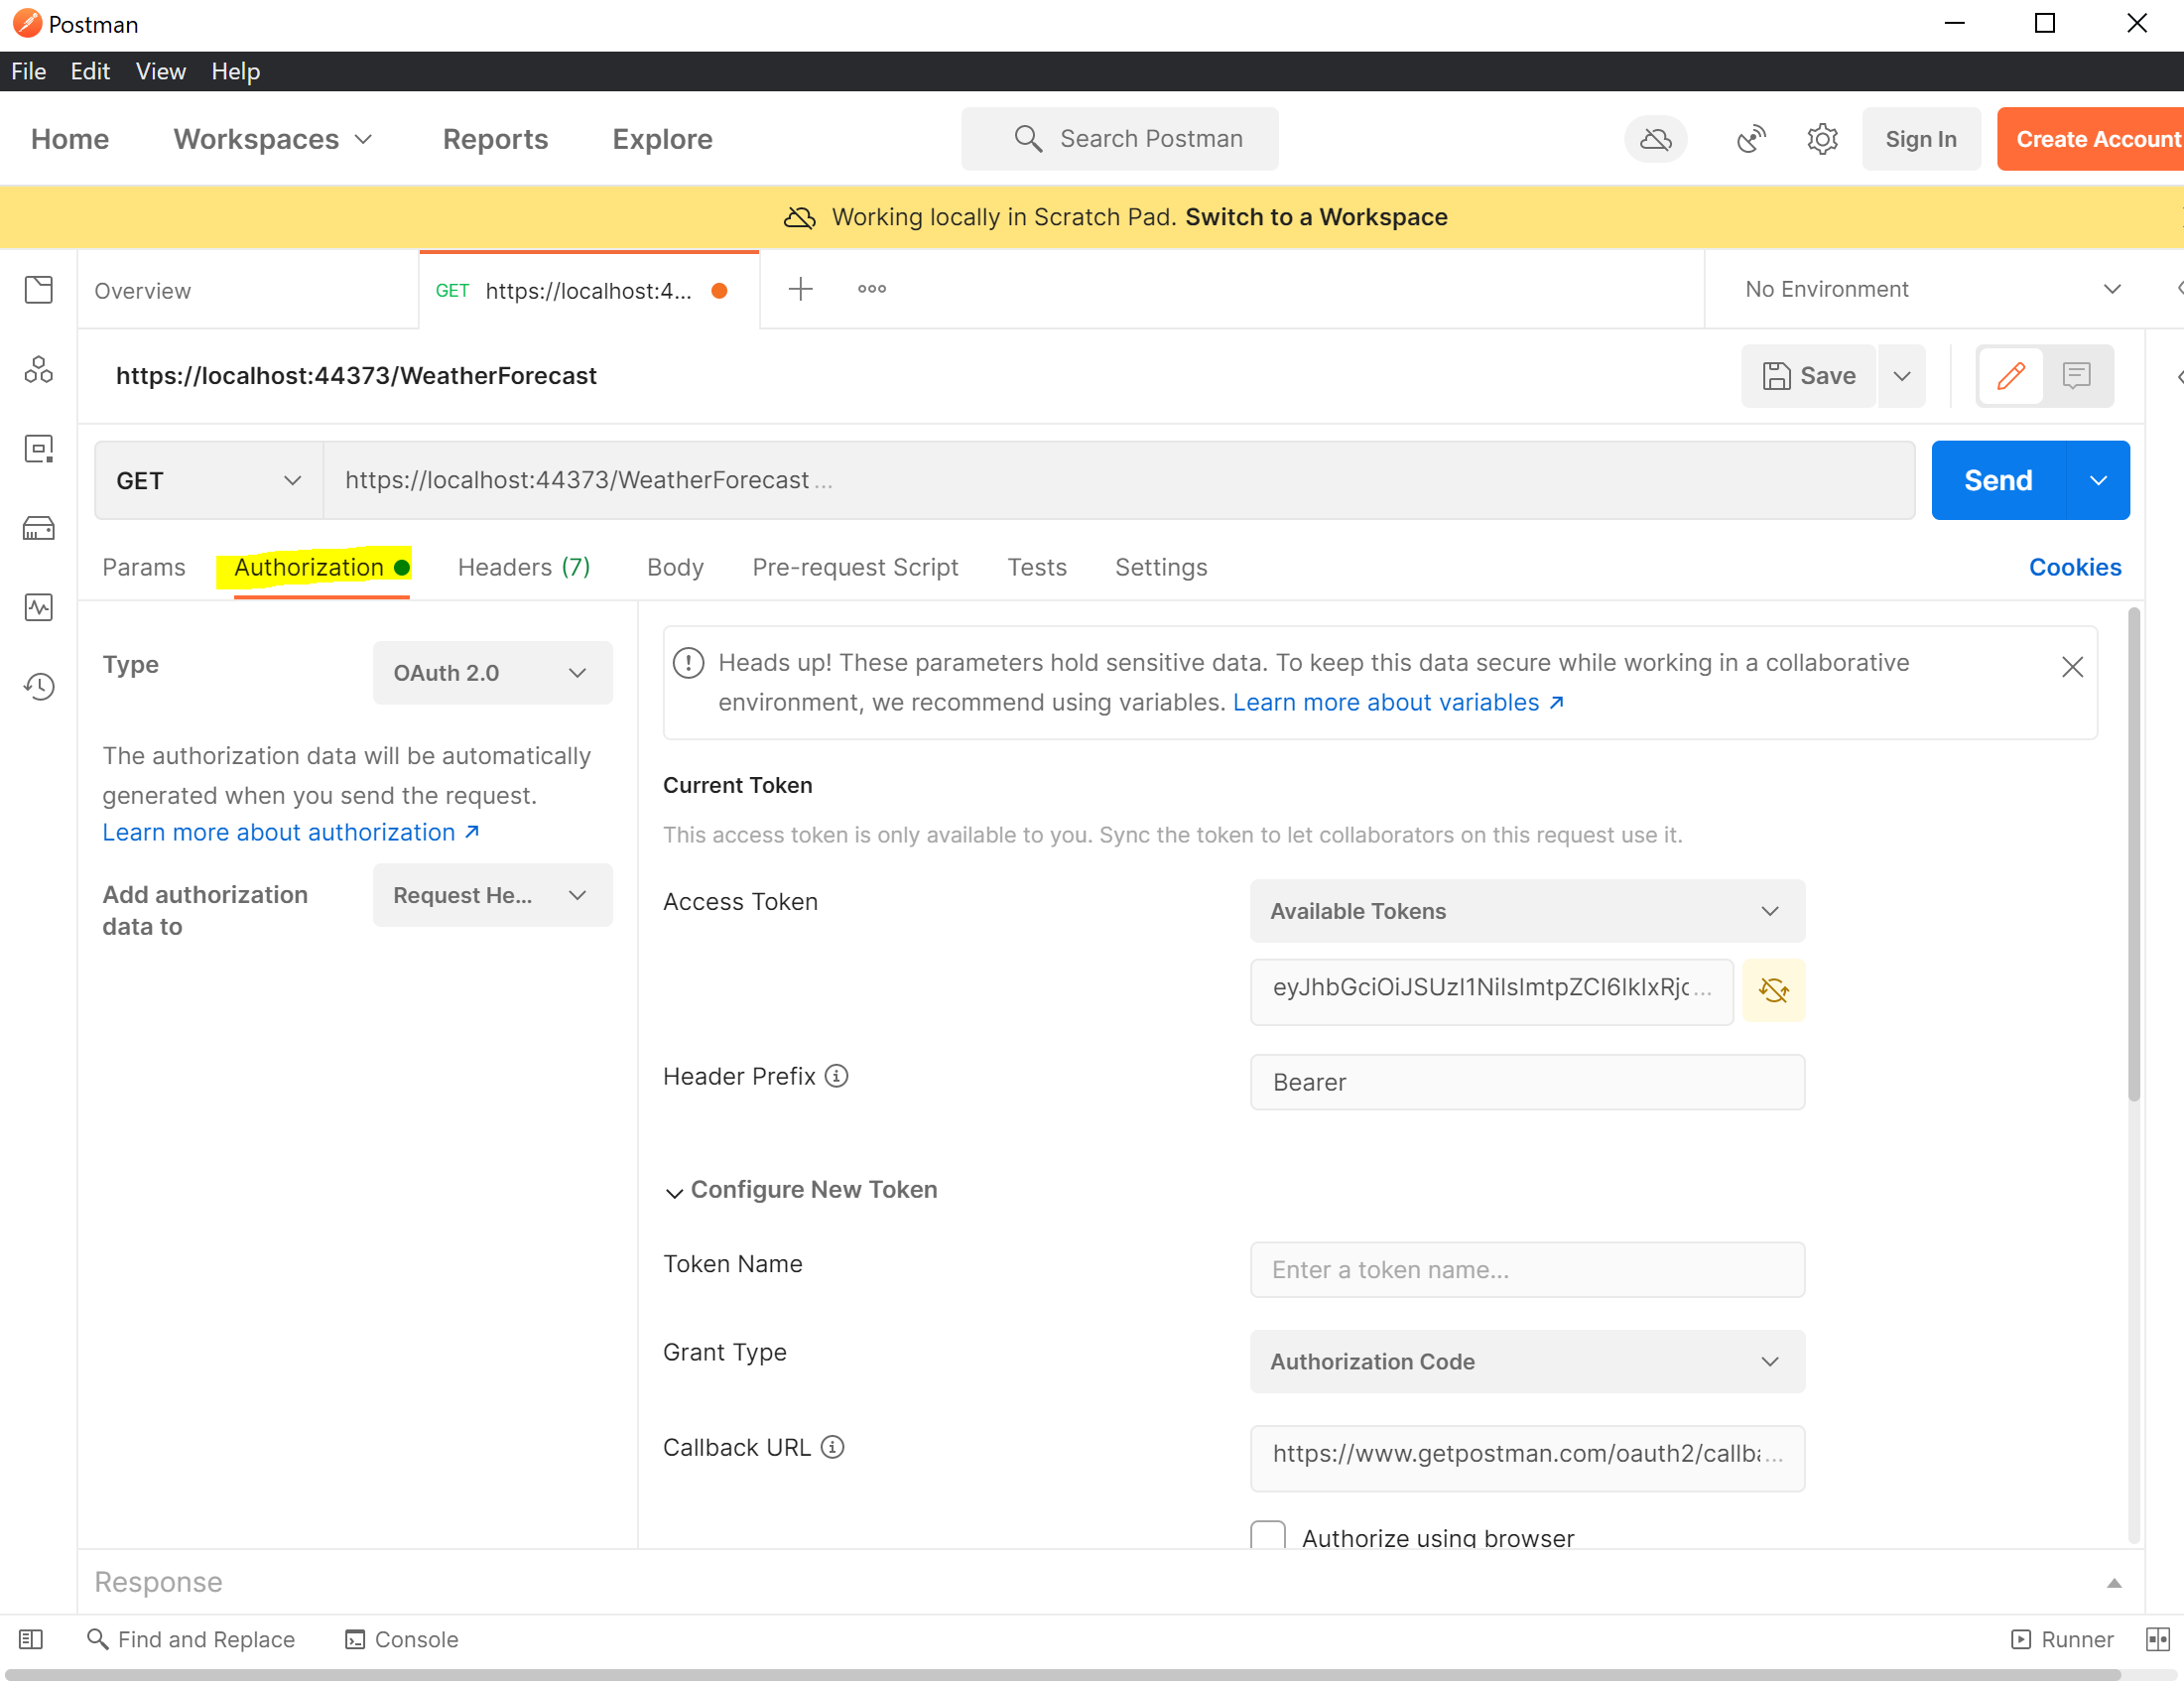 Set the Type to Oauth2 and the Add Authorization data to Request Headers:
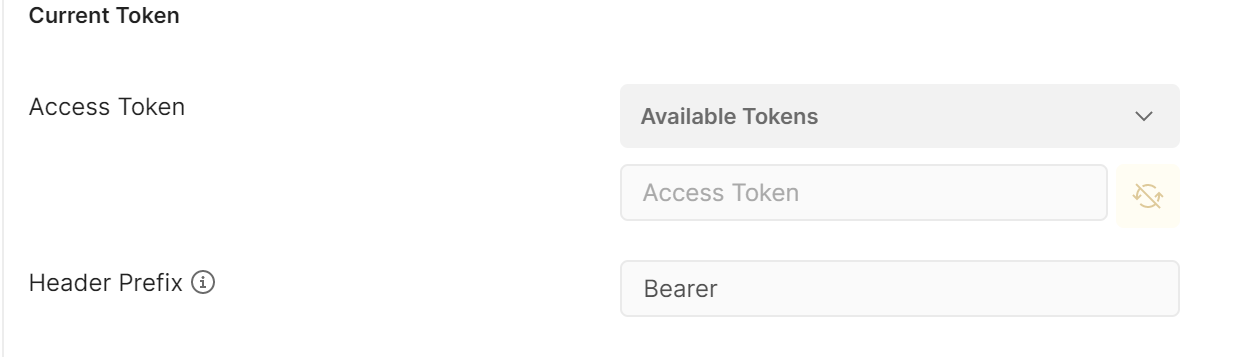
 Enter Bearer in the Header Prefix textbox:
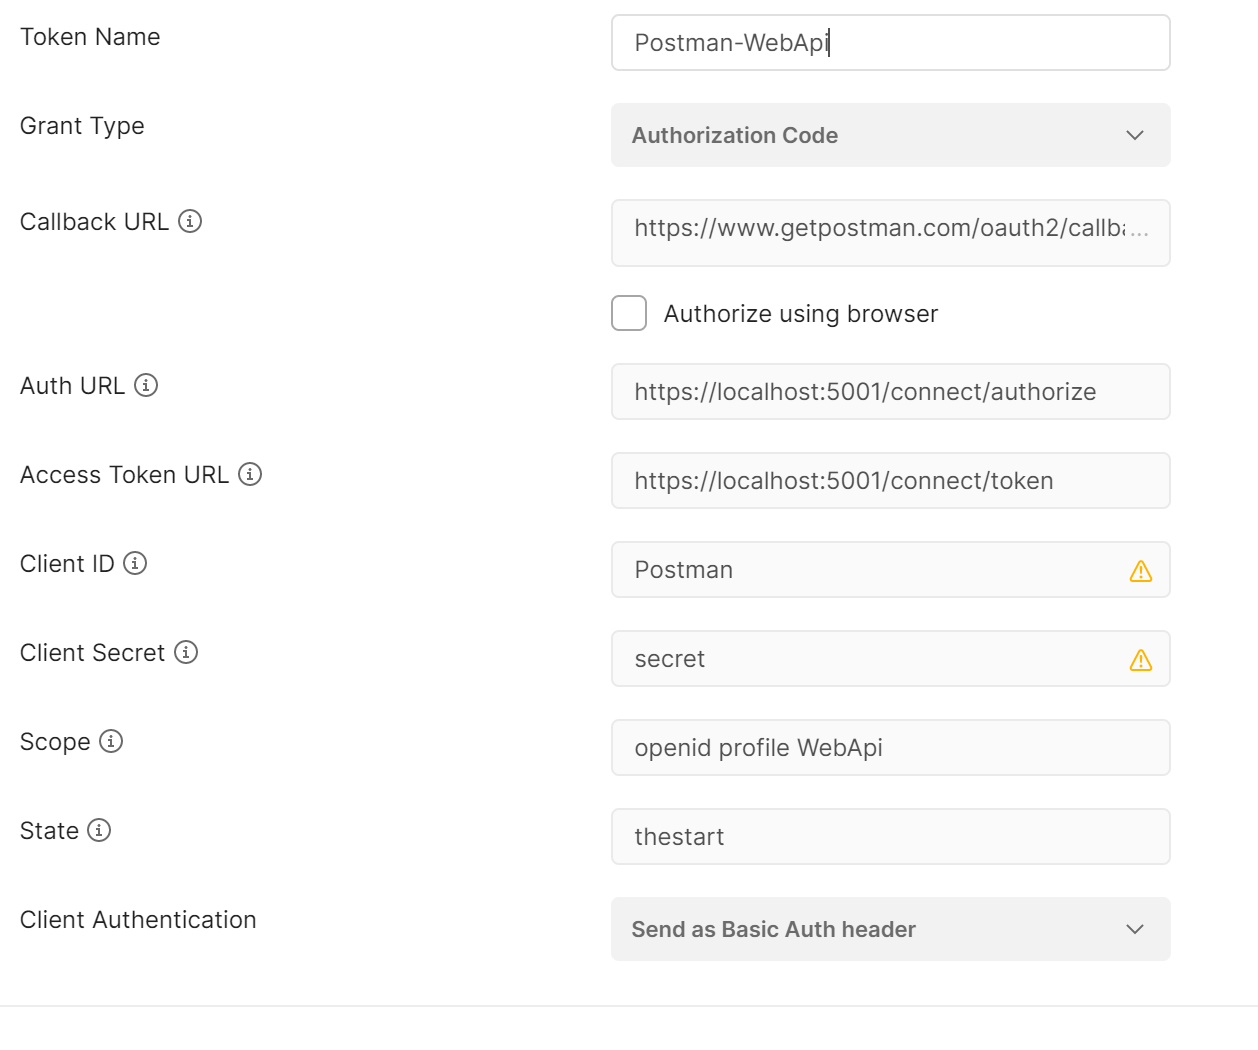
 The rest of the configuration should reflect the client configuration and Identity Server implementation:
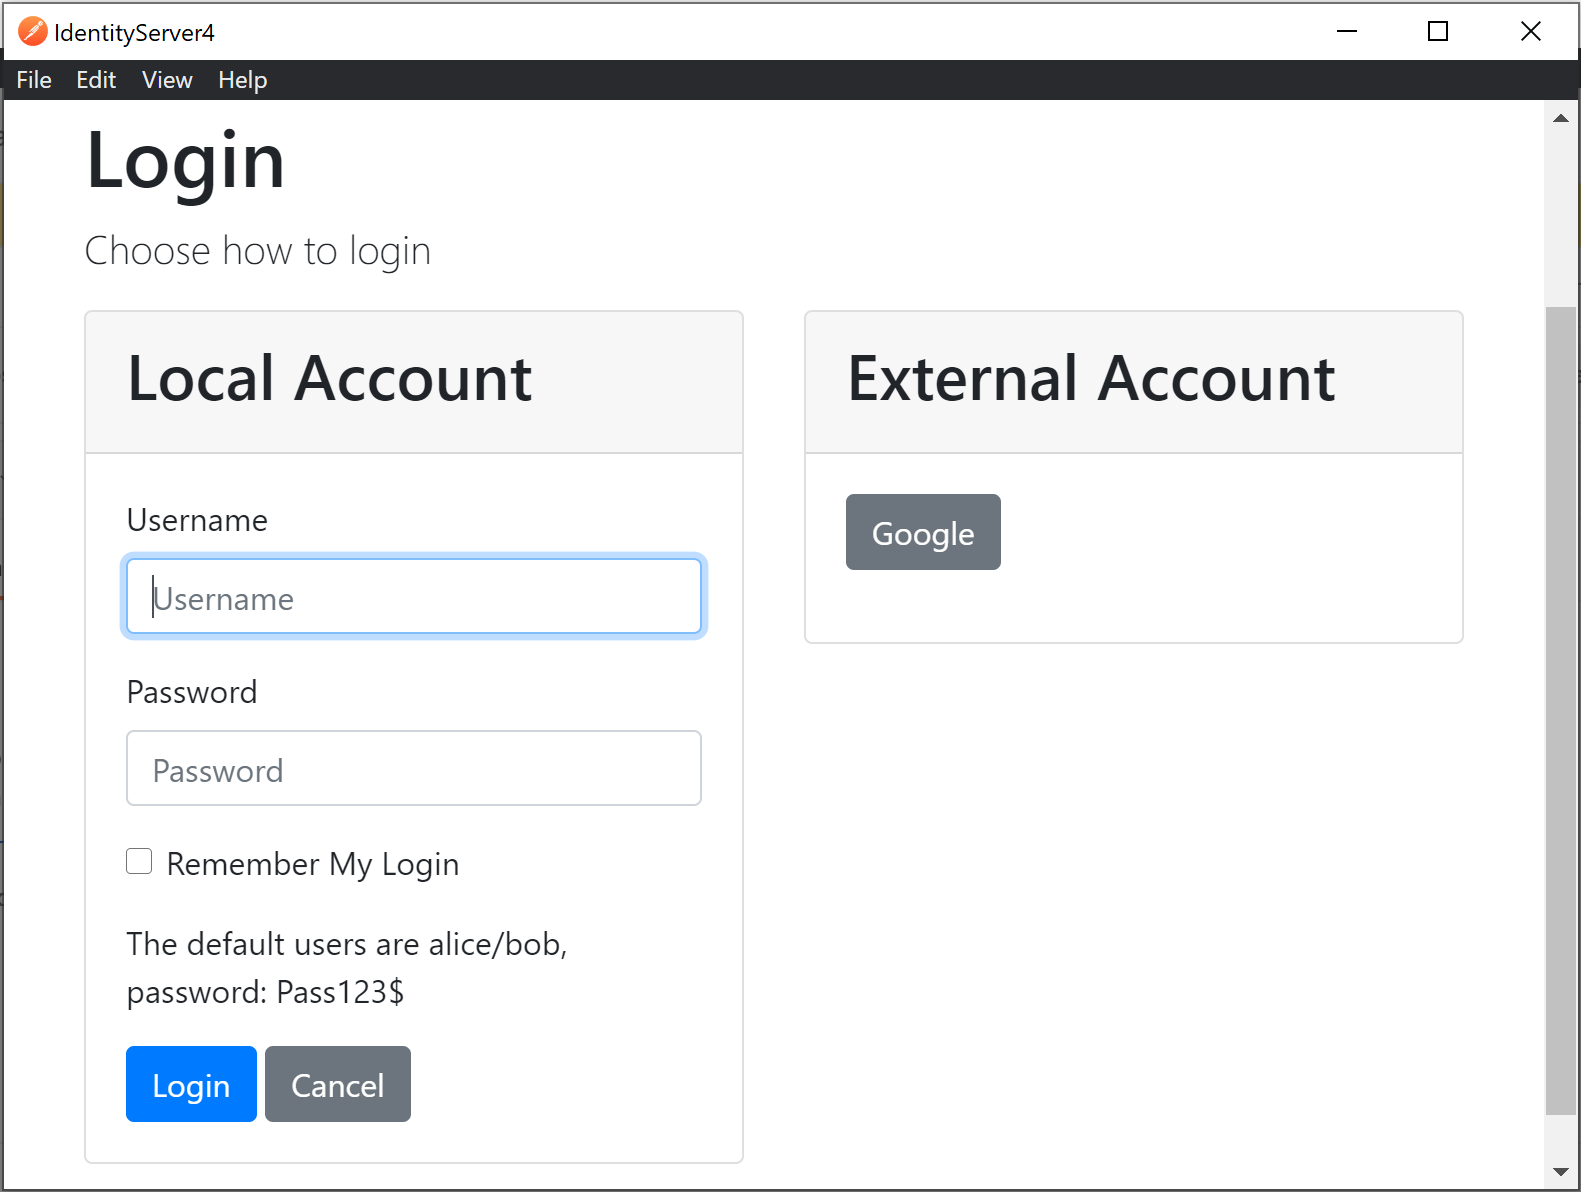
 Clicking on the Get New Access Token button should open the Identity Server login dialog:
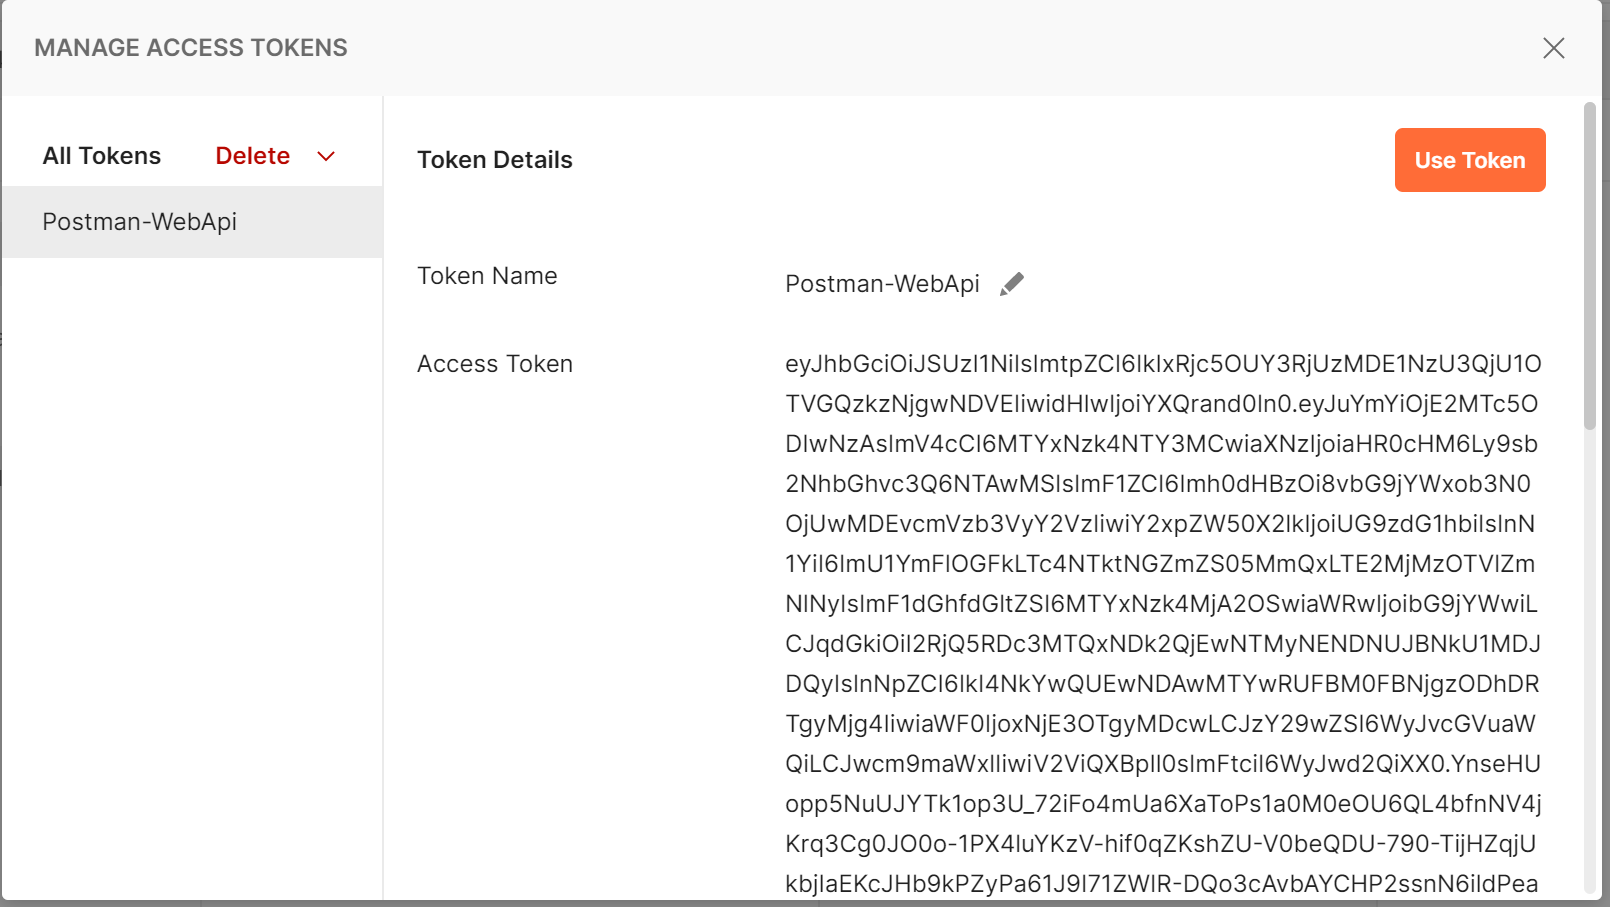
 On logging in with a valid username and password, Postman will display the Manage Access Tokens dialog and the access token provided can be used by clicking on the Use Token button:
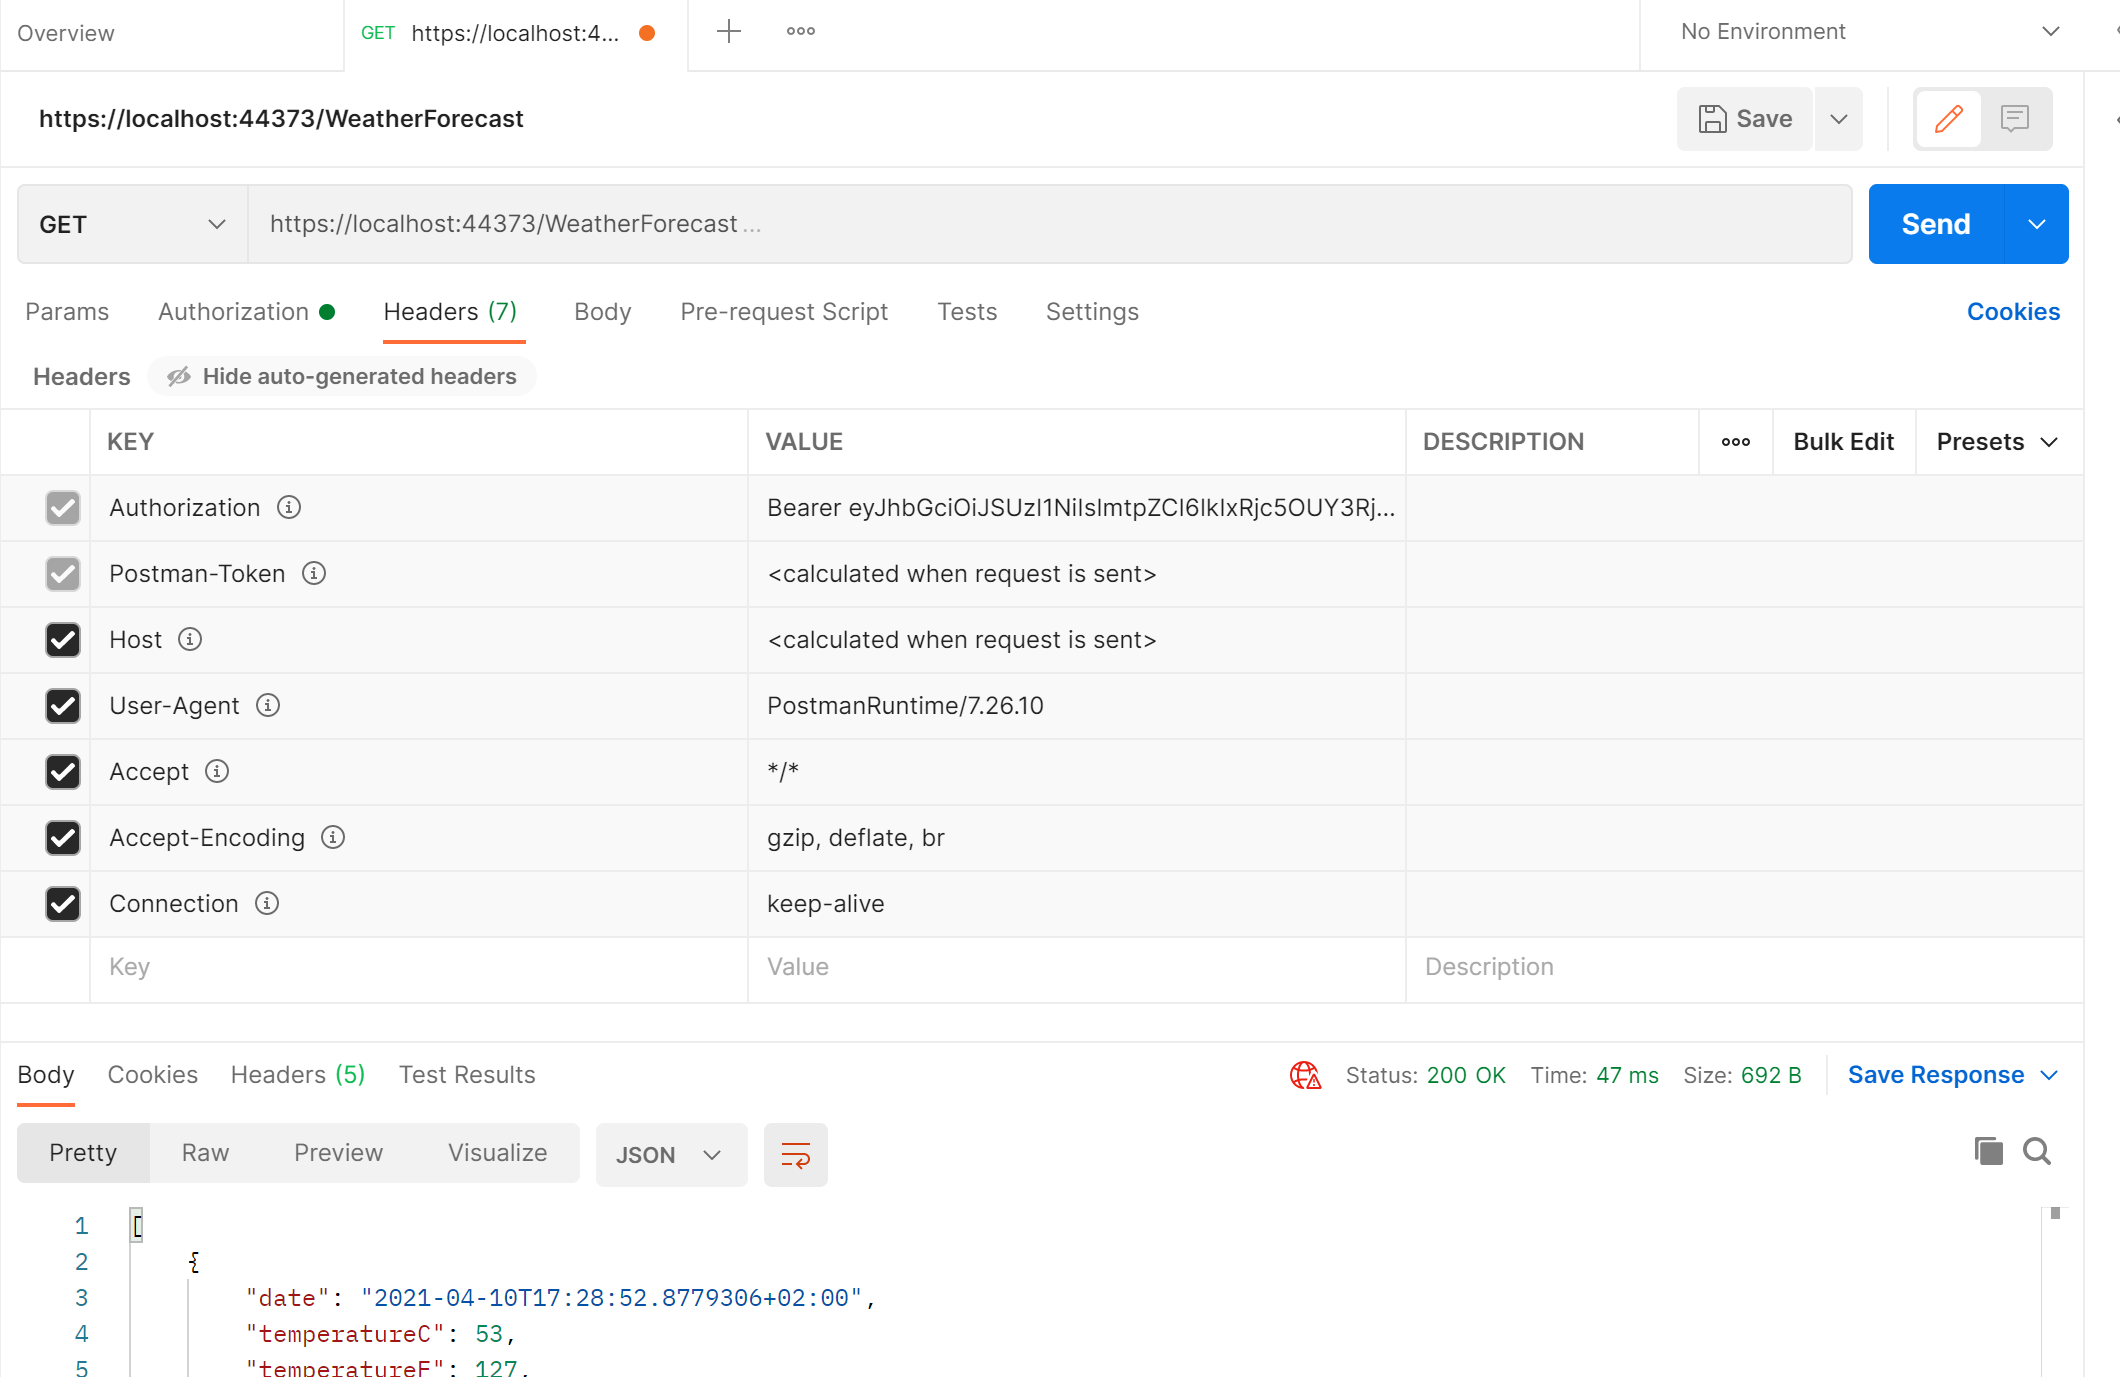
 Now when a request is sent a Bearer token is added to the request headers and a the endpoints will return a successful response:
 Because the Web Api project is using https and a self signed certificate you may receive an Error: unable to verify the first certificate message. In the File>Settings options of Postman you can turn off SSL Certificate Verfication:
 I hope you find this post useful, the source code can be found here in github


